In many companies, Drawings are still were “the rubber meets the road”. Let’s take a look at what I think will be some of the more popular enhancements to the Drawing and Detailing area of SolidWorks 2012. I’ve tried to keep the descriptions short and sweet because like me, I’m sure many of you don’t have time to read a long drawn out article. So lets get started. 🙂
Magnet Lines
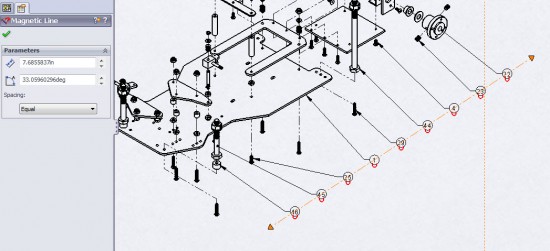
If you’ve ever used 3dvia Composer, this one will look really familiar. You can place magnet lines AFTER balloons are created or DURING creation if you use the Auto-Balloon functionality. Magnet Lines are invisible unless you select a Balloon that is attached to one. The most efficient process if you are adding existing Balloons is to drag the cursor over each balloon that you want to include WHILE you are drawing the magnet line. Once it is created, you can set the Magnet Line to show equal spacing between Balloons or non-equal spacing through the “Free-Drag” option. If you like your drawings to be neat and orderly, You’ll like this enhancement.
Here’s a short video showing Magnet Lines in action.
Auto-Insert Center Marks
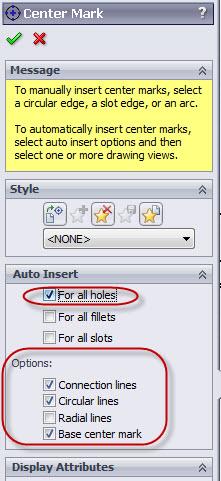
If you don’t want SolidWorks to automatically create centermarks upon view creation (Option in the System Options), this option allows you to perform this action as you need it. This is a huge time saver for those parts with LOTS of holes. All you need to do is call up the Center Mark command and check one of the options under the Auto Insert group box. There are some options with this…one of which I haven’t been able to get to work. I would expect the “Connection Lines” option to automatically draw the connection lines between Center Marks that are vertically or horizontally aligned, but it has not worked for me as of yet. I’ll update the article once I get some more information on this. Outside of this discovery, this is another nice enhancement that can cut down on mouse clicks.
Highlighting Changed Dimensions
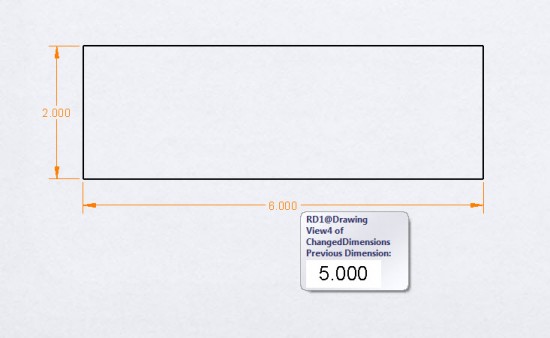
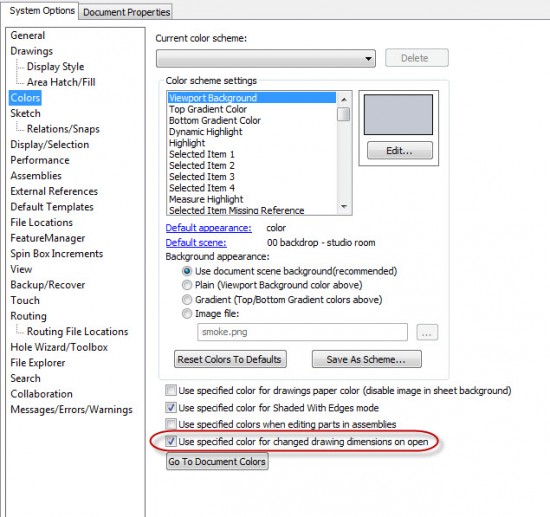
Simply put… Turn THIS ON! This will alert you as to when dimensions change in a saved drawing when you open it by showing the dimension is a different color. At the moment I can’t think of any reason why you wouldn’t want to use this. You have to turn this on thru the Tools->Options->System Options->Colors area. (Screenshot shown below.) The drawing must be opened to take advantage of this functionality. If you hover over one of the changed dimensions, a popup box shows you the previous dimension. If you change the model WHILE the drawing is open, you won’t see the color change. Once you save the drawing, the changes are accepted and the color change and indication of the previous dimension goes away the next time you open the document. (NOTE: I tried to print a PDF of the drawing WHILE the dimension change colors were in effect and the color did NOT show up in the PDF.)
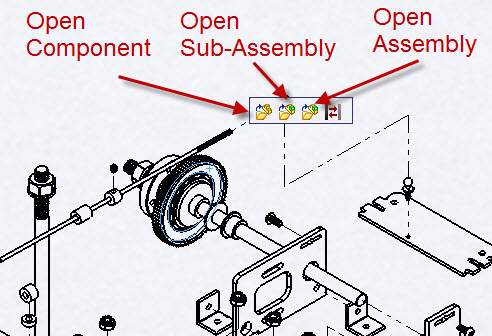
Open Assemblies and Sub-Assemblies from Drawing Views
This one is a nice little enhancement. When you hover over a component you have the option to open the top level assembly, sub-assembly, or component itself. Previously you could only open the component itself.
There are more enhancements…and you can see the complete list online HERE.
That’s all for now…stay tuned….more to come!
